
How to Develop Customized WordPress Pagination Without Using Plug-ins?
Pagination or the Page Navigation is like the index page of your web page. If your blog page offers viewers with a lot of posts, then pagination makes browsing easy by providing a smooth user experience. Pagination is an important feature of a blog post. While WordPress comes bundled up with only link options like the ‘next page’ and the ‘previous page’, making navigation difficult; Page Navigation helps a user know instantly how many pages does your blog page has and even allows users to select a particular page out of the rest. It is a standard practice that removes the need of having to load all the posts at once. Without Page Navigation, it’s not only time consuming but also makes website browsing exasperating. A lot of WordPress websites today have the pagination in their blog pages. There are WordPress pagination plug-ins that you can use. However that could overkill the task, since you can manually add the pagination functionality to your WordPress blog page easily with only a few number of php and css lines.

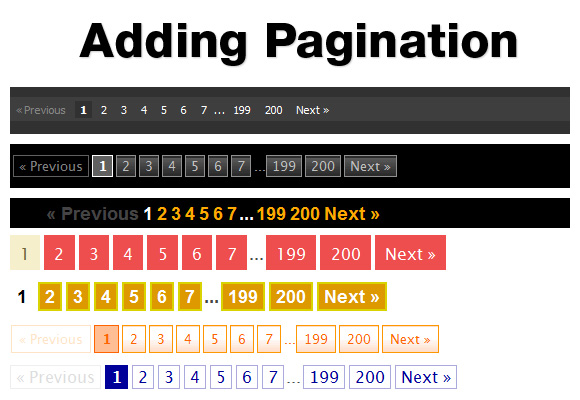
Adding Pagination To Your WP Blog Page: A Step by Step Guide
Display the pagination links on the default index page. Just type the code – PageName_pagination ( ); and you are done with it.
You would be getting 2 optional parameters that you can pass – function PageName_pagination($pages = ”, $range = 2)
The first parameter indicates the number of pages. It would be necessary to pass this only if you are going to use a custom loop. The second parameter sets the number of links that would be displayed. The Range functions as an indication to tell the script regarding the number of links that should be displayed before and after the current page. These number links are usually displayed prior to the display of small arrows. In case if you want to visit the first page, then the script with the default range of 2 would display the 2 following page links, the next page link and the last page link.
If you click on the number of 4 link, then the pagination script would directly take you to the current page; while at the same time linking pages 2,3,5 and 6 as well.
Next you need to access the global variable $paged. This helps WordPress to store the page that your viewers will currently view. In case the variable is shown empty, then you can set it as 1. This will make the page that your visitors are currently at, active. Here is a sample example of the global variable $paged script:
[code]
global $paged;
if(empty($paged)) $paged = 1;
[/code]
This will help us to know which page we are currently viewing. Next you can determine the total number of pages that exist in your blog page by typing the following script function – max_num_pages. This can help you check whether there are more than 1 number of web page, for which pagination is necessary. Below is a sample example of how the script would look like:
[code]
if($pages == ”)
{
global $wp_query;
$pages = $wp_query->max_num_pages;
if(!$pages)
{
$pages = 1;
}
}
[/code]
You can fetch the WordPress page url using a specific function and that is – get_pagenum_link().
The following function will fetch you the url along with the page number which will look something like this – get_pagenum_link(2).
Now going to the CSS part of the pagination, it is rather simple and this is how the HTML output would look like –
[code]
<div class=’pagination’>
<span class=’current’>1</span>
<a href="http://www.kriesi.at/blog/page/2">2</a>
<a href="http://www.kriesi.at/blog/page/3">3</a>
<a href="http://www.kriesi.at/blog/page/2">›</a>
<a href="http://www.kriesi.at/blog/page/12">»</a>
</div>
[/code]
Some of the few CSS rules that you would need to know for the purpose of styling –
[css]
.pagination {
clear:both;
padding:20px 0;
position:relative;
font-size:11px;
line-height:13px;
}
.pagination span, .pagination a {
display:block;
float:left;
margin: 2px 2px 2px 0;
padding:6px 9px 5px 9px;
text-decoration:none;
width:auto;
color:#fff;
background: #555;
}
.pagination a:hover{
color:#fff;
background: #3279BB;
}
.pagination .current{
padding:6px 9px 5px 9px;
background: #3279BB;
color:#fff;
}
[/css]
Custom Loops
Using custom loops anywhere on the web page requires you to call the function PageName_pagination ( ) with the first parameter set. You can use a simple custom loop for your website with the following script code –
[code]
<?php $additional_loop = new WP_Query("cat=1,2,3&paged=$paged"); ?>
<?php while ($additional_loop->have_posts())
: $additional_loop->the_post(); ?>
<!– Show loop content… –>
<?php endwhile; ?>
[/code]
You can then call the pagination function by typing:
[code]
PageName_pagination($additional_loop->max_num_pages);
[/code]
Adding a proper page navigation function to WordPress has become comparatively much easier than what it earlier used to be. Refer to the above functions in your own personal or commercial templates to build a free WordPress post navigation function without the need of integrating plug-ins.
- Do’s and Don’ts of Mobile App Marketing via Social Media - March 30, 2019
- 8 Digital Marketing Trends in 2019 You Should Follow - February 6, 2019
- Voice Search Optimization: Tips for Your Creative Content Marketing Plan - July 30, 2018
Related Posts


About The Author
Sarah Clark
Sarah Clark, working in B3NET Inc. & Mobixed as Content Developer. B3NET is leading web design & web development company from Orange County, California, Search Optimal is the Internet Marketing division of it. Sarah is working in web, mobile & Internet marketing domain with her 8 years of experience.