
WordPress Twenty Fifteen Tutorial: How To Customize The Default Theme
“Less can indeed be more” and that is what WordPress theme Twenty Fifteen talks all about. With Crisp typography, streamlined navigation and generous spacing, the default theme aims to draw a visitor’s attention to what matters the most – i.e. the text and the image of a website. However, following the words of Ben Huberman; “keeping things simple and streamlined doesn’t mean you can’t make a theme your own, of course…”. Whether it is customizing your site with free color schemes or including ample space on the vertical header area,
Twenty Fifteen provides you the perfect canvas to showcase your creative vision.
In this article, let’s focus on the different ways in which you can easily customize this default WordPress theme into a design that is just right for your site. Here we will look into the built-in customization options, self coded solutions to certain problems, and the plug-ins that can introduce further improvement to the style.
#1- Steps To Begin Customization Of The Default Theme
To begin customizing the default theme, click on the ‘Customize’ option present in the Appearance section in the admin. You will find the following options to customize:
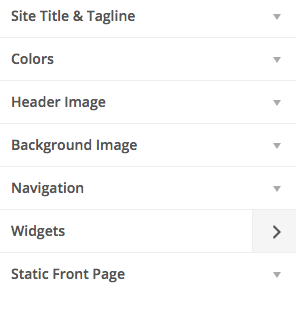
-
The Site Title and Tagline
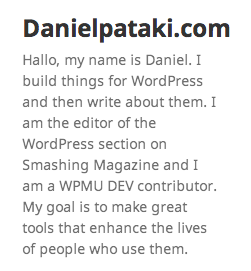
Configuring the site title and tagline of your WordPress website is one of the most standard functionalities you would find in any theme. You may however, completely prefer to disable this using a checkbox; which might turn out to be helpful if you prefer to add a header graphic along with a logo via the child theme.
Here’s an example of how it title and subtitle looks like –
-
Colors
When you click on the ‘Colors’ section, you gain access to some of the most visible color customization options. You can click to customize the color theme from these four settings –
The Base Color Scheme – The Base Color Scheme allows you to choose a preset color for your website’s sidebar and the content.
The Background Color – This option allows you to customize the background color of your website’s main content area. However, the colors of the content boxes will remain the same.
Header and Sidebar Text Color – Customize the text color of your website’s Header and the Sidebar. On small device screens, the sidebar would become the header.
Header and Sidebar Background Color – The Header and Sidebar Background Color settings allow users to set the background color of the area present in the sidebar or header.
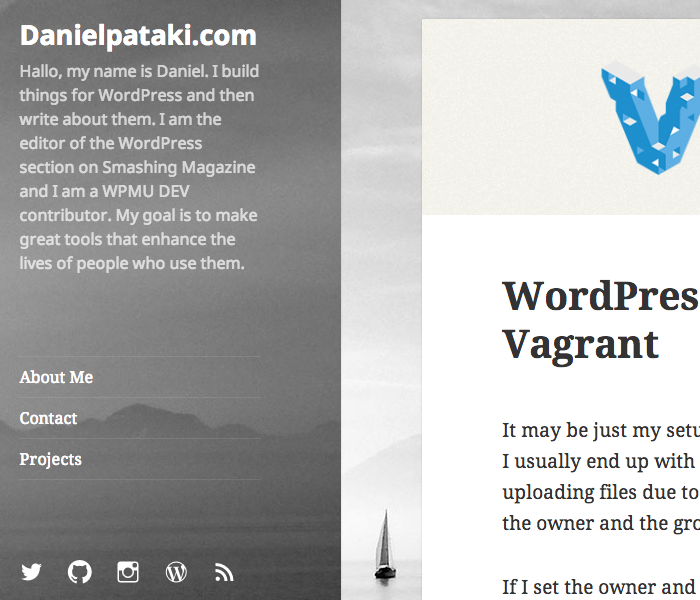
Take a look at the example below to understand the color variations:

-
The Header and the Background Images
Both the Header and the Background Images are sections containing one settings that governs the background image for both the content and the sidebar area. Before you head to use an image here, set up a background color that looks good. This will make your site look pleasingly beautiful even if something goes wrong and the image does not load.
-
The Navigation, Front Page and Widgets
By clicking on the Navigation menu, you can assign your menus on two menu locations that are present within the theme.
Create a widget and preview it from the Customer, a superb feature that overhauled in the 3.9 version of WordPress and is comparatively more usable than before.
You can select a page that had been previously created and use it as your website’s static front page.
#2- Steps To Begin Customizing The Menus And The Social Links
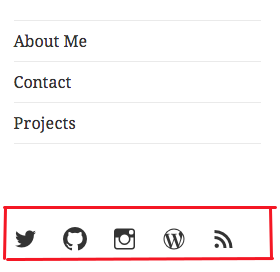
Assemble your site’s menus by accessing the ‘Menus’ option from the ‘Appearance’ option. You can seek help from WordPress’s Menu User Guide (http://codex.wordpress.org/WordPress_Menu_User_Guide ) if you want to learn about the basic tasks to help you out with the built-in menu editor. The new Twenty Fifteen WordPress theme now offers users with additional features like creating social menu icons that can link you to your favorite services.
Here is a list of some of the social sites that you can link to –
Pinterest, YouTube, WordPress, Vimeo, Twitter, Tumblr, StumbleUpon, Skype, Reddit, Polldaddy, Pocket, LinkedIn, Instagram, Google+, Path, Flickr, Facebook, Dribble, Digg
#3 – Customization Using WordPress Plugins
If the default customization settings is not enough, then you can use some of these incredible WP plugins to customize the site just the way you want it:
Typecase Web Fonts – For Customizing Google Fonts
Twenty Fifteen comes with two great font types – Noto Sans and Noto Serif. With Typecase Web Fonts installed, you can select fonts that you want to avail from the Theme Customizer. After that, visit the Theme Customizer and select the suitable options that you want to apply for the website’s heading and body copy.
With Typecase Web Fonts, you can add custom selectors that can help to tailor specific elements to the fonts.
-
Easy Twitter Feed Widget Plugin – For Adding A Twitter Feed
You can make your website more interactive by adding a Twitter Feed to the sidebar. With the help of this plugin, you can easily customize to change the look of the Twitter Feed.
-
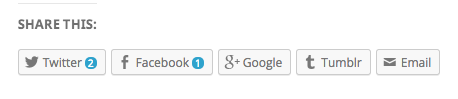
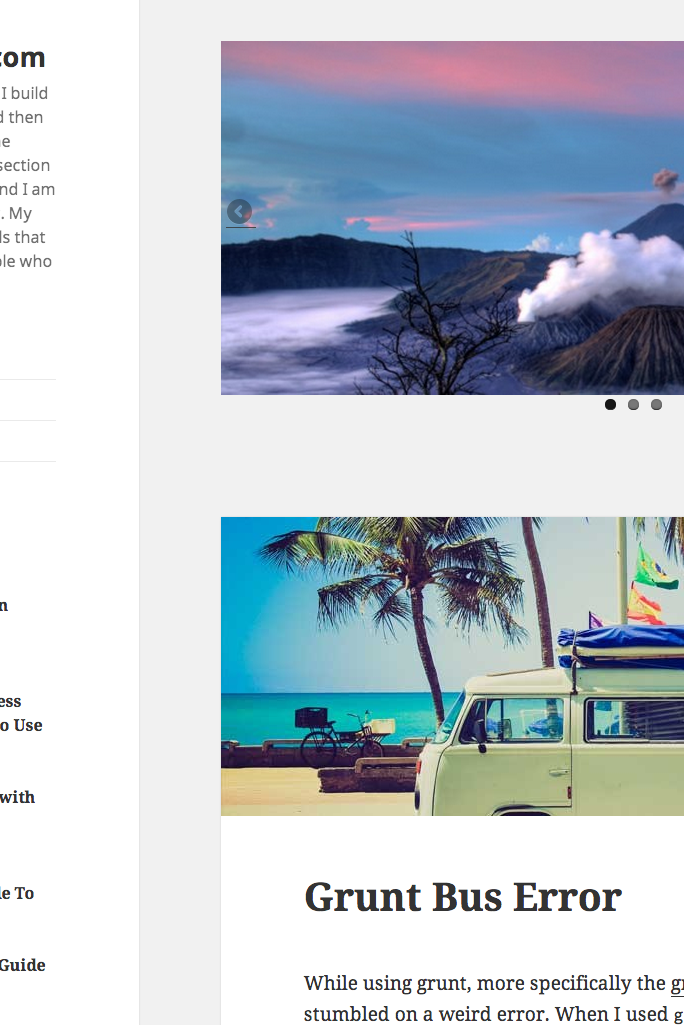
Jetpack – For Customized Tiled Galleries and Shareable Links
This plugin comes with a large number of features to help you customize your website and one of them is the Tiled Gallery feature. With this feature, you can go ahead and automatically create a masonry style gallery from the gallery shortcodes. Simply turn on the feature and you have a customized layout for the gallery page.
You can even use the WP plugin to add shareable links at the bottom of your posts. This is how the links would look like in Twenty Fifteen –
#4 – Customize Your Twenty Fifteen Theme Using Codes
For this, first you need to create a child theme before you head on to customizing the theme. This is because, child themes enable a user to modify or update a parent theme without having to worry about losing any changes.
Once you are done with that, you may start to implement the custom changes.
-
To Move The Sidebar To The Right
Though there are no options that you can use to switch the website’s sidebar to the right side, however, you can do this by adding a couple of styles to the style.css file of your child theme.
Use a Chrome Developer Tool to help you figure out the styles. Click on the Shift+Command+C in order to bring up the menu and hover it over the sidebar. In general, the .sidebar and the .site-content come with some rules that push them to the left. You can overwrite them properly to reverse the rules. This needs to be done with proper care, since some rules need to be set in default. For example, you can overwrite to change the float to the left that is generally found on the left side. If the general rule is set as ‘margin-left: 20 px’, then you should write it as ‘margin – left: auto; margin – right: 20 px;’ . Though this might seem simple, many of you tend to do this wrong by defining it as ‘margin – right: 20 px’ in the child theme.
In order to make sure that the background separator lines up with the new layout, use this code to add the separator – ‘ : : before pseudo – selector ‘.
Do not forget to wrap the code in the media query. These can only be applied to large screens, while the sidebars might appear as the header in case of the smaller screens. This happens by default on small desktop screens at 59.6875 em or 955 px.
#5- Steps To Remove The Author Section
It is absolutely unnecessary to keep an author bio section below the blog posts, if you have a single author website. There are two methods that you can follow, in order to do away completely with the functionality.
-
Removing it from the view
Add the following by going to the style.css file – .author-info { display:none; }. Though the text will remain where it is, nevertheless it will remain hidden from the view.
-
Removing the functionality
There is a second option also! You can remove the functionality completely. Copy and paste the content.php file into the child theme from the parent theme.
Just open the file where it starts with ' // Author Bio' and delete everything. Look at the example below to view the full code that you would have to remove -

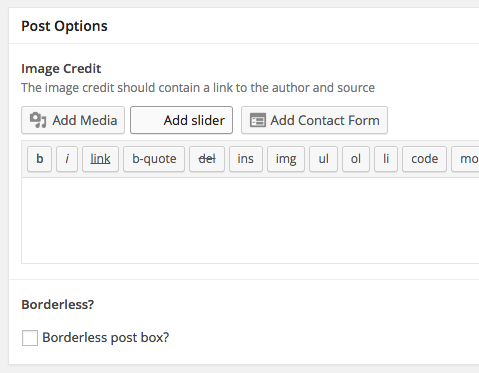
#6 - Steps To Customize by Creating Borderless Boxes
You can come up with borderless box format for your post and even display images within the box via Advanced Custom Fields. You can easily create a true or false control type that is the edit screen for each post. The state of the box can be checked easily, whenever you load a post and output the tick of a special class.
Simply hook the function into a post_class hook.
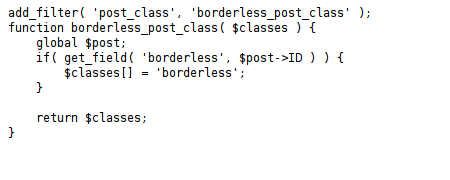
You can check whether the borderless option box has been ticked or not by using function get_field. If there is a tick mark, then we can add to the post an array of classes. You can choose to keep selective classes depending on what you want to keep and what you do not want to keep. For e.g. – you may choose to keep it borderless but have the meta description box, or you may want to remove the meta description box altogether.
There are several ways by which you can easily customize the Twenty Fifteen theme and make it right, just for you. With the help of built-in customization, you can easily control some the basic settings of the theme. On the other hand, with the help of plugins, you can extend the functionality of the Twenty Fifteen theme. Almost any of the fundamental changes can be achieved using the child theme, with which you can add and remove elements, or even customize the theme into a modular style.
Images / Screenshots Courtesy: danielpataki.com
- Do’s and Don’ts of Mobile App Marketing via Social Media - March 30, 2019
- 8 Digital Marketing Trends in 2019 You Should Follow - February 6, 2019
- Voice Search Optimization: Tips for Your Creative Content Marketing Plan - July 30, 2018
Related Posts


About The Author
Sarah Clark
Sarah Clark, working in B3NET Inc. & Mobixed as Content Developer. B3NET is leading web design & web development company from Orange County, California, Search Optimal is the Internet Marketing division of it. Sarah is working in web, mobile & Internet marketing domain with her 8 years of experience.