
Tips for Using Tablets with Photoshop for Photography
Working in Adobe Photoshop CS5 becomes easy and enhanced with a drawing tablet. Emulating the stroke of natural media tool is free from hassles with this device. Moreover, a tablet helps you position your body just the way you wish, thus helping you stay in a position of rest, in a relaxing ergonomic gesture. When you are accustomed to the pressure-sensitive stylus of the drawing tablet, barrel-mounted programmable keys and built-in eraser, you will find it difficult to return to a conventional pointing device.
Let’s have a look at the tips for using tablets with Photoshop.
Install the software
Set up the tablet manufacturer’s driver software according to the directions given in the owner’s manual. Plug the tablet into your PC’s USB port or powered hub. Select a hub that plugs into the wall outlet, as a bus-powered USB hub may not provide adequate power for operating your tablet.
Launch the software
Launch the tablet software, which will provide you with the way to examine the pressure sensitivity for the eraser and the tip. It should also help you choose the performance of other parameters, such as tilt, barrel button functions and double-click sensitivity. Fix the barrel-mounted switch to the pointing device function, such as the right-click or double-click.
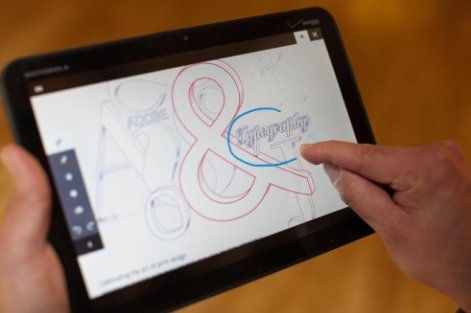
Start working on Adobe Photoshop
To begin working on Adobe Photoshop, create a new document by selecting ‘New’ from the ‘File’ menu. For choosing the ‘Brush’ tool, press the ‘B’ key and then select ‘Brush’ from the ‘Window’ menu for displaying the ‘Brush’ panel. As you are using a tablet, you could set the brush dynamics for enlarging your brush diameter while pressing harder on the tablet. Moreover, you could specify jitter that helps to add more natural brush appearances to your painting strokes. In addition to these options, you could gain access to fade control for the brush strokes that fade between the starting and the ending diameters.
Experiment with new options
It is important to make use of the new options, as and when they become available to you. Lay down the practice strokes and adjust the brush controls while experimenting. Try with different hardness settings and brush shapes. Check out whether you can sign your name with the tablet. Make your signature look like an authentic replica of your pen-and-ink calligraphy.
Test the tablet stylus
Test your tablet stylus on tasks beyond the regular drawing and painting tasks. Practice the process of navigating menus and activating the data-entry fields of the panel. After some time, you might not require your mouse any longer.
Work with digital photograph
Open a portrait after closing your practice document. Click on the ‘Healing Brush’ in the toolbox or press the ‘J’ key on the keyboard. Practice the process of touching up small details at high magnification.
Make experiments with a tablet
Make experiment by using your tablet for painting a portion of the photograph that you like to color with a ‘Curves’ or ‘Levels’ adjustment layer. Observe how the pressure sensitivity changes the way you are painting. If you want, you can also turn off this feature for painting assignments that require a constant brush size.
Paint image corrections
Notice how you could improve the skin tone, clean up the flyaway hair, brighten the subject’s eyes and reduce wrinkles readily by using tablet for painting image corrections. You could add layer in ‘Color’ mode and apply painted corrections for repairing a scar, intensifying eye color and accentuating brows.
Select with the Marquee tool
Make use of the Marquee tool for selecting the face of the subject. You can then choose ‘Copy’ and ‘Paste’ from the ‘Edit’ menu. Select ‘Liquify’ and practice facial reshaping of the nose or chin of the subject. Note how easily you can manipulate the details of the image with a stylus, in contrast to the situation when you are forced to depend on a mouse. Moreover, notice that the pressure sensitivity makes it easy to over-adjust details and get carried away, mainly with powerful redesigning tools such as the ‘Liquify’ filter.
Practice healing distractions
Close the file of your portrait and open a document containing an outdoor scene. Make experiments with your tablet for cloning or healing litter on the lawn or for cloning a shrub to replace a gap in a hedgerow. Try practicing healing distractions in a pond or a sky. Consider painting a cloned branch for removing a gap in tree cover.
Switch on to the ‘Lasso’ tool
Use Lasso tool by selecting it either in the toolbox or by pressing ‘L’. Choose an object in the landscape scene, by first making use of the regular ‘Lasso’ tool and then the ‘Polygon’ version. You will find that you could work easily around a handmade selection while not gripping the mouse for isolating details.
Turn around the stylus
Turn around the stylus for making experiment with its integrated eraser. Switch on to the ‘Eraser’ tool in the Photoshop and use the stylus for erasing around a foreground subject in the image. You could then go to the other tools and check out the behavior of the stylus eraser when the eraser of the Photoshop is not selected.
Attain a desired level of repair
Open the image you have saved in layered PSD format of Photoshop, with the adjustment and the retouching layers intact. Select a project in need of considerable careful cleanup for attaining your desired level of refinement or repair. Recreate your retouching work on new layers for comparing the ease of working with the stylus to the difficulty of executing the same image manipulation with a mouse.
Check out these tips and learn the process of using tablets with Photoshop for photography. Undertake training on Photoshop for Photographersand make the best use of Photoshop for your photography profession.
Content Copyrighted To TechnoWorldNews.com

If you like This post, you can also Like and follow Techno World News on Facebook . Subscribe to Techno World News feed via RSS. You can also contribute to this blog, if you are interested Email here.
Latest posts by Techno World News (see all)
- Elevating Security Paradigms in Marketing: A Holistic Expedition - November 22, 2023
- Why CMMS Is Becoming A Critical Component In The Manufacturing Industry - August 7, 2023
- How Safety Standards for Autonomous Vehicles will Help Reduce Serious Car Accidents - July 29, 2023
Related Posts


About The Author
Techno World News
If you like This post, you can also Like and follow Techno World News on Facebook . Subscribe to Techno World News feed via RSS. You can also contribute to this blog, if you are interested Email here.