
Perfect Way to Add Favicon in Your WordPress Sites
If you have WordPress website or blog and want to brand it well to the people all over the World, favicon is a very tiny but essential part of your branding. The favicon gives a visibility to the people who are browsing the internet using multiple tabs.
What is a Favicon?
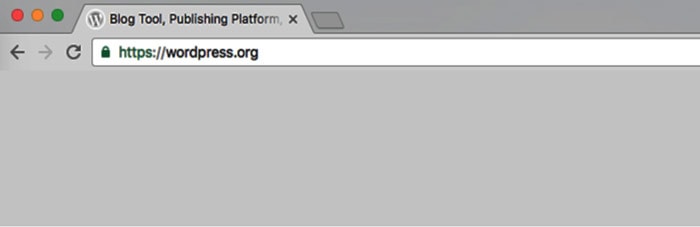
If you are a beginner in this field, you’re probably wondering what is actually a favicon. Well a favicon is a small or tiny icon mostly 16 px x 16 px height and width which appears just before the website page title in your browser tab.

What is the perfect size of a Favicon?
Well it can be in different sizes. Most of the time people recommend 16 px x 16 px as it is very small in size and don’t affect your page load time. But you can also try 32 by 32 px, 48 by 48 px. WordPress recommend 512 x 512 pixels among others.
A WordPress favicon is not only used for browser’s tab icon but also displayed in the URL bar and application icon in mobile devices.
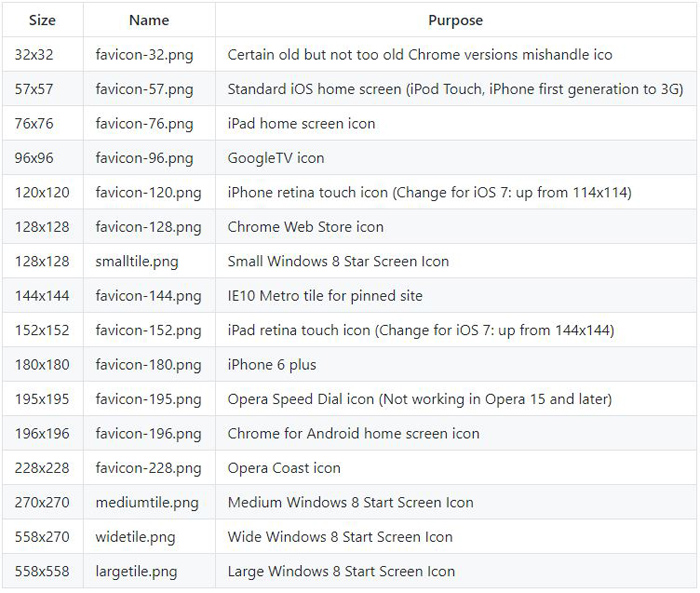
You can create a single favicon.ico file that contains icons of sizes 16 x 16, 32 x 32, and 48 x 48 as Microsoft recommends.
Here is the table for different favicon sizes:
What is the Favicon file extension?
It is normally saved with .ico extension in the WordPress directory but you can use it as other image formats also like JPG, PNG and GIF
Best Practices of Favicon
If you want to stand out with your branding then you need to follow the best practice of using favicon.
1. Place it inside your website’s root folder
2. Make it lightweight
3. favicon should reflect your brand logo or a significant portion of the logo which can be recognized by others easily.
4. Make it transparent so it looks good.
How to create Favicon easily?
You can create it using any photo editing software like Adobe Photoshop, GIMP. But if you want to create it fast and easy way, you can do this way. Try using online favicon generator like Real Favicon Generator. Best part is this tool is coming with WordPress plugin, so you can create it and implement it to your website without any hassles.
Why you should use WordPress Favicon?
1. Favicon increase the user experience and usability for your website. If there are multiple tabs are open the title can be hidden, so that by the favicon will help you to recognize the right tab for the right website.
2. When a web visitor add your site or page to their home screen on mobile devices, the favicon becomes the icon they use to easily identify the website or page later on.
3. Favicon can be very useful for bookmarking your site or page. Web users can easily find the page identifying the icon from bookmarking list.
How to add a WordPress Favicon?
There are many ways to add favicon in WordPress. Before adding you need to create appropriate favicon for your WordPress site. The image should be 512 x 512 pixel wide and tall.
WordPress Customizer:
WordPress Customizer comes with a feature that helps adding a favicon very easily. Follow the below steps to add the favicon using WordPress Customizer.
1. Login to WordPress admin and navigate to Appearance -> Customize:
2. Next, click Site Identity tab to reveal Site Title, Tagline and Site Icon:
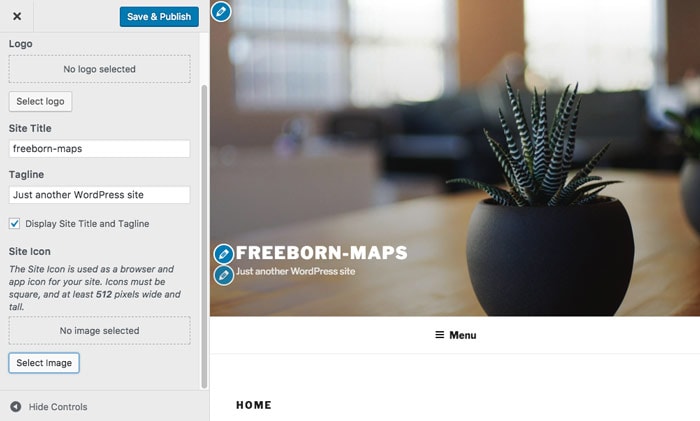
3. Click on the Select Image button and upload the image.
4. Then, click the Select button on the ensuing screen:
 5. Now, click the Save & Publish button
This is it. Now just refresh, clear your browser cache and reload your site so you can see the favicon. I would recommend to try a WordPress Favicon plugin called All In One Favicon WordPress plugin.
All In One Favicon WordPress Plugin:
It WordPress Customizer is not working properly, you can use a plugin called All In One Favicon.
Follow the below steps to use All In One Favicon
1. Login to your WordPress website admin dashboard, navigate to Plugins and click Add New:
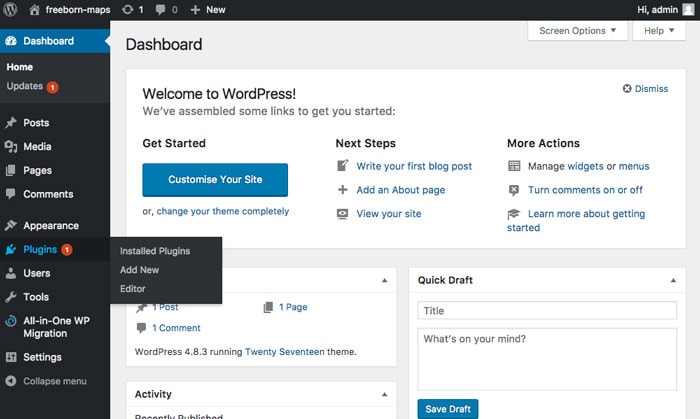
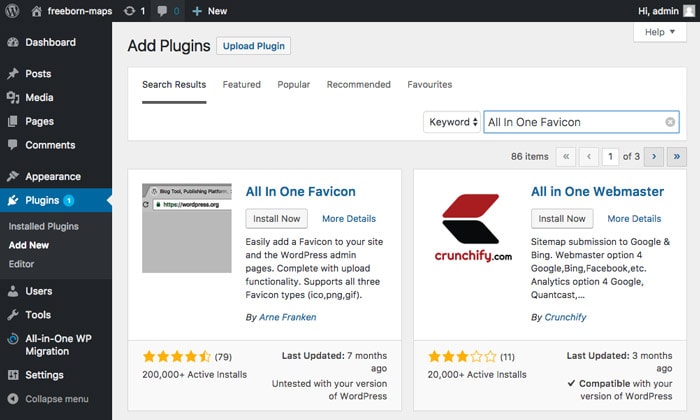
2. Search for the plugin “All In One Favicon”, then install and activate it.
3. After activation, go to the plugin setting section Settings -> All In One Favicon:
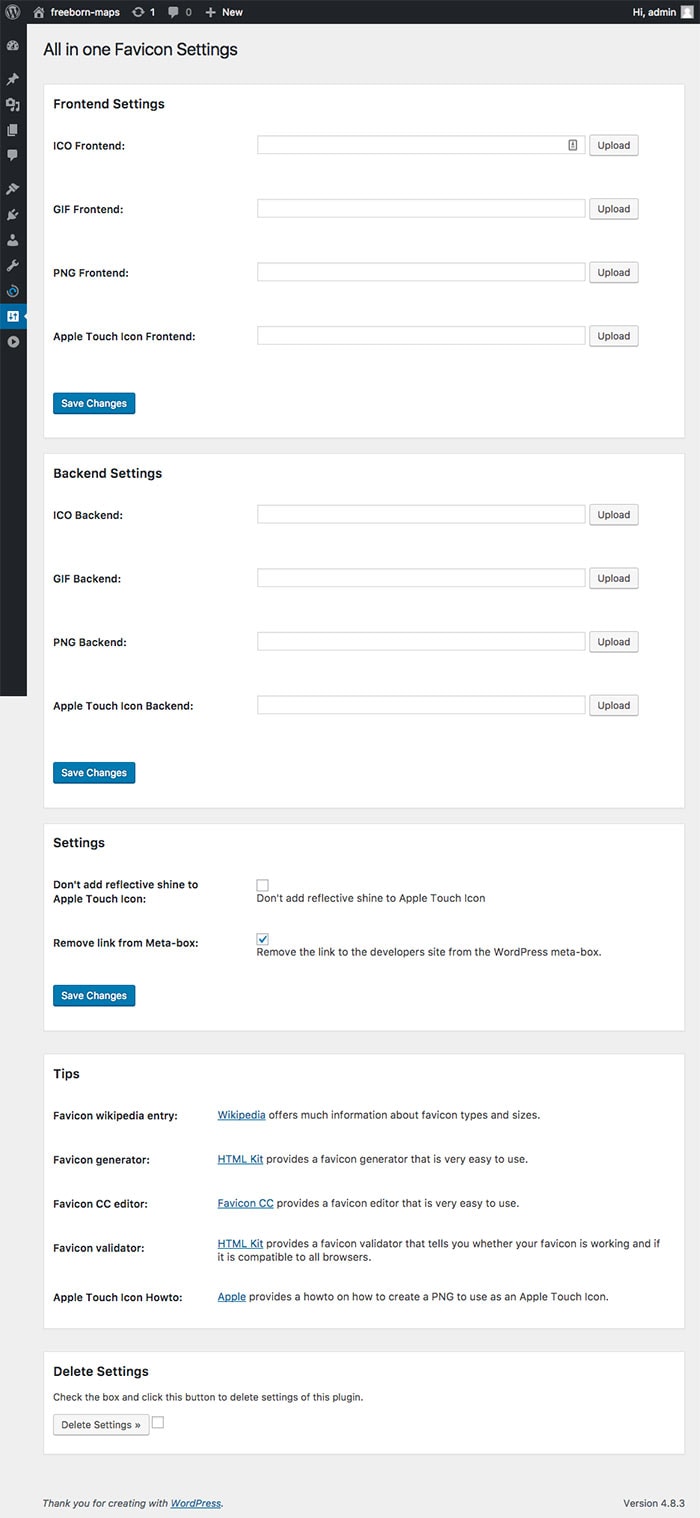
4. In the setting you can find 5 sections
- Frontend Settings – It allows you to add frontend favicon with formats like ICO, GIF and PNG.
- Backend settings – Like the frontend settings but it is for the backend, the “back office” side of your site that the admin and logged-in users see.
- Settings – Here, you can add or remove reflective shine to Apple Touch icon and the link to the developer’s site.
- Tips – In this section, you find various information regarding Favicon.
5. If you are a starters then decide the image format i.e. ICO, GIF or PNG and the Apple touch icon you wish to use.
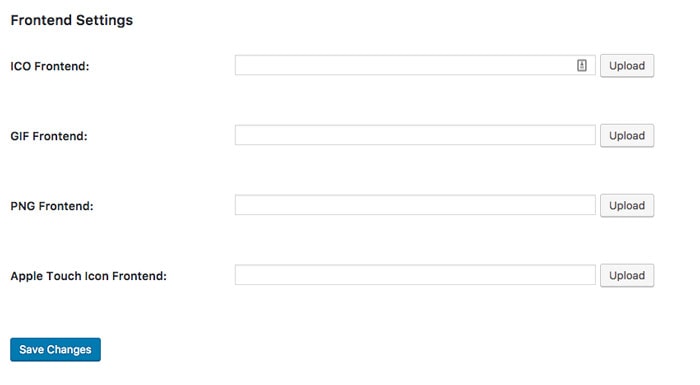
6. After that click the Upload button in the respective field, select your image and click the Save Changes button:
7. After this reload the site to see the update. You may need to clear your browser cache if the favicon doesn’t show immediately.
How to Add Favicon to WordPress Manually
Apart from WordPress Customizer and various Favicon WordPress plugins, you can add it manually also. It is very easy to add, you need to just follow the steps mentioned below:
1. Create an appropriate favicon file.
2. Login to your website’s FTP
3. Go to public_html and search for the folders like wp-admin, wp-content and wp-includes
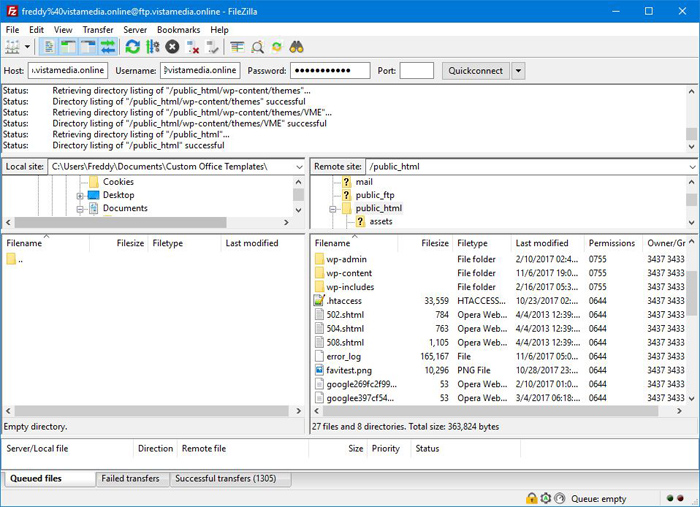
4. If you find these folders don’t open those, just upload the favicon file in the root directory.

5. Now your need to open the folder called wp-content and go to the theme section and search for the active theme you are using. wp-content -> themes -> Your_Active_Theme Paste the favicon.ico file there as well.
That’s it, now just refresh the website to see the updated favicon.
Another Way to Upload Favicon:
While the following steps are unnecessary, it are uploading favicon inside the <head> section of your site, and there will be more if your have multiple favicon files.
1. Login to WordPress root directory via FTP.
2. Upload all Favicon.png files to the WordPress root.
3. Then navigate wp-content -> themes -> Your_Active_Theme and from here download header.php file.
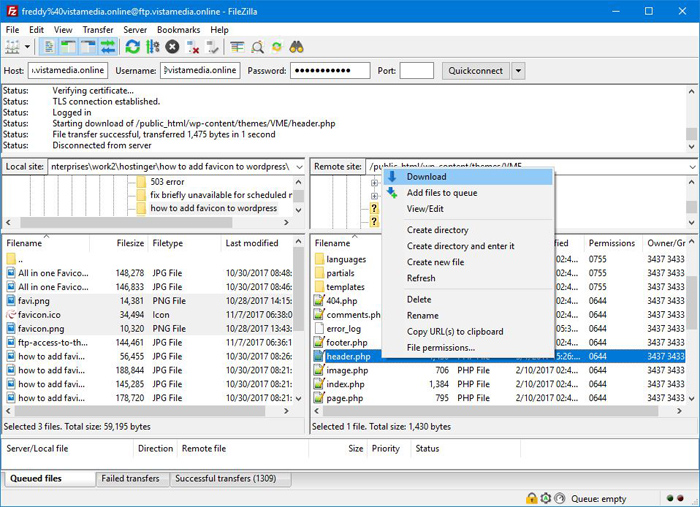
4. Open the header.php file in notepad or any text editor.

5. Now add the following codes inside <head> </head>. Put the code just after opening head tag <head>
[php]
<!– Desktop browsers (including 16×6, 32×32 & 48×48 PNGs) –>
<link rel="shortcut icon" href="/favicon.ico?x49821">
<!– Modern browsers & Devices –>
<link rel="icon" type="image/png" href="/favicon-16×16.png?x49821" sizes="16×16">
<link rel="icon" type="image/png" href="/favicon-32×32.png?x49821" sizes="32×32">
<link rel="icon" type="image/png" href="/favicon-48×48.png?x49821" sizes="48×48">
<link rel="icon" type="image/png" href="/favicon-64×64.png?x49821" sizes="64×64">
<link rel="icon" type="image/png" href="/favicon-96×96.png?x49821" sizes="96×96">
<link rel="icon" type="image/png" href="/favicon-128×128.png? x49821" sizes="128×128">
<link rel="icon" type="image/png" href="/favicon-196×196.png? x49821" sizes="196×196">
<!– iOS & other mobile devices –>
<link rel="apple-touch-icon" href="touch-icon-iphone.png">
<link rel="apple-touch-icon" sizes="76×76" href="touch-icon-ipad.png">
<link rel="apple-touch-icon" sizes="120×120" href="touch-icon-iphone- retina.png">
<link rel="apple-touch-icon" sizes="152×152" href="touch-icon-ipad- retina.png">
<link rel="apple-touch-icon" sizes="167×167" href="touch-icon-ipad-pro.png">
<link rel="apple-touch-icon" sizes="180×180" href="touch-icon-iphone- 6plus.png">
<!– Windows Tiles (optionally omitted and replaced with browserconfig.xml in root directory) –>
<meta name="msapplication-TileColor" content="#582686" />
<meta name="application-name" content="Your Website" />
<meta name="msapplication-square70x70logo" content="tile-small.png" />
<meta name="msapplication-square150x150logo" content="tile-medium.png" />
<meta name="msapplication-wide310x150logo" content="tile-wide.png" />
<span style="display: inline-block; width: 0px; overflow: hidden; line-height: 0;" data-mce-type="bookmark" class="mce_SELRES_start"></span><meta name="msapplication-square310x310logo" content="tile-large.png" /><span style="display: inline-block; width: 0px; overflow: hidden; line-height: 0;" data-mce-type="bookmark" class="mce_SELRES_end"></span>
[/php]
6. Save it and upload it again to the theme’s folder.
Final Words
As per above information and instruction you can see adding a Favicon to your WordPress website is very easy. As it increase your brand value you should add it to your website immediately. If you are getting any problem to add favicon use the above mentioned steps, you can comment below and we are always happy to help you at any situation.

- Eye-Catching Thumbnails: A Powerful YouTube Channel Growth Tool - November 26, 2023
- Unlocking the Tech Trick: How to Create Gmail and Google Voice Without a Number - October 21, 2023
- Unveiling the Intriguing Journey of eUniverse in Shaping an Early Metaverse-Like Experience Amidst Cyber Challenges - September 23, 2023
Related Posts


About The Author
Debarup
Hi friends, This is Debarup Mukherjee, a Digital Marketing Specialist, SEO Consultant & Blogger. I have over 12 years experience in Digital Marketing. I love to write on technology and SEO. I have built many blogs, one of them is Techno World News, specially for Technology & Internet. Hope everyone like and enjoy this blog and get valuable information which you can share with your friends. You can ask me anything on my Twitter, Facebook or Google+ Account